

Welcome back LEGO friends! Who wants to learn how to build a LEGO lamp? Well, a LEGO Minifigure Lamp, that is!

Disclaimer: Please use common sense when constructing your LEGO Lamp. Consider using glue for a sturdy finished lamp that will withstand day to day use. Brickablocks.com is not responsible for the accuracy of recommendations included in this listing, as they are based on previous experience and generalized lamp characteristics - meant to be used as suggestions.
This week, we thought we would share a great little project you can do on your own if you find yourself stuck with out any LEGO sets to build. All you need is a simple lamp kit from the hardware store, a LEGO minifigure storage head, a screw driver, and a drill!
We'll walk you through all of the steps, and show you where you can find all of the parts you will need to build your own LEGO LAMP. Sorry - LEGO Minifigure Lamp!
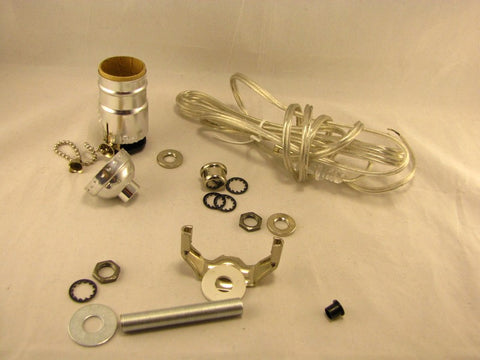
Here is the simple lamp kit we will be using to build our LAMP:
For the base of our LEGO lamp, we went with the small classic yellow LEGO minifigure head for the lamp body. This is a minifigure storage head, in case you are not familiar with the product.
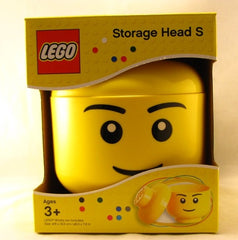
These LEGO minifigure storage heads are available in multiple sizes, and face styles. You can find them on amazon starting at around $16.

Amazon product link: LEGO Storage Head Small, Girl, Yellow The lamp assembly kits are available at most any hardware store, and I have even seen them at Wal-Mart. You can also find them at Amazon, of course. They start at about $11 online, but I have seen them as low as $7 at the hardware store.

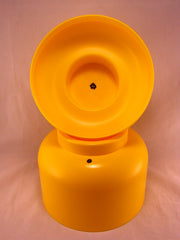
Amazon product link: Bottle Lamp Kit with Adaptors - 8 pieces Ok, once you have everything you need, it is time to get started! First, you'll need to mark your LEGO Storage head so you can accurately drill access points for the lamp stem, and electric cord.
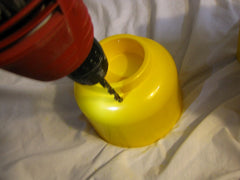
For this next part, get a grown up to help. Drill through each mark with a 1/4 inch drill bit. When drilling the access point for your lamp stem, drill at an angle to create a large enough hole for the stem bolt.
Ok, now you should have your storage head in two parts, with access points drilled in each. Next, take the bottom piece of your storage head and run the electric cord through the hole as shown.

Pull it all the way through...

Next, you'll build the lamp stem using the through bolt and top to your LEGO storage head. Grab the bolt, the top to your storage head, the washers and nuts, and the lower half of your socket as shown in this image:

Connect your socket bottom to the bolt and tighten it, then screw on one nut, followed by a washer, and rubber gasket if your kit included one.

Press this assembly through the top of your LEGO storage head access hole:
.JPG)
Flip this assembly over and thread a washer onto the bolt, then another nut and tighten the assembly so that the storage head top is sandwiched between a washer on top and bottom.
.JPG)
.JPG)
Now thread the electric cord through the bolt from below:
.JPG)
And pull it all the way through the lower half of the lamp socket:
.JPG)
Connect the cord to the positive and negative terminals on the lamp socket. Be sure to follow the instructions included with your kit, and have a grown up assist!
.JPG)
Then set the socket into the socket holder:
.JPG)
Finally, complete the assembly by clicking the socket top in place:
.JPG)
In the end, you'll have a simple desk or table lamp for your LEGO Room or bedroom. Pick up a lamp shade that suits the personality of your LEGO head!
.JPG)
Thanks for stopping by, and happy building! -Brian from Brickablocks.com Want more DIY? Why not have a look at our library of simple build instructions and build something fun with your LEGO collection?